Happy Easter, friends! Hope you’re keeping safe wherever you are. It feels weird to celebrate Easter on lockdown but this is what is absolutely necessary at this time to combat this terrible pandemic that has swept over much of the nations of the world.
The virus cannot, however, take away the importance of Easter in the life of a Christian. The Easter holiday happens once a year but for many Christians like myself, everyday is Easter as we are daily grateful for the ultimate sacrifice of Jesus Christ. His death means that nothing, absolutely nothing, can separate us from God.
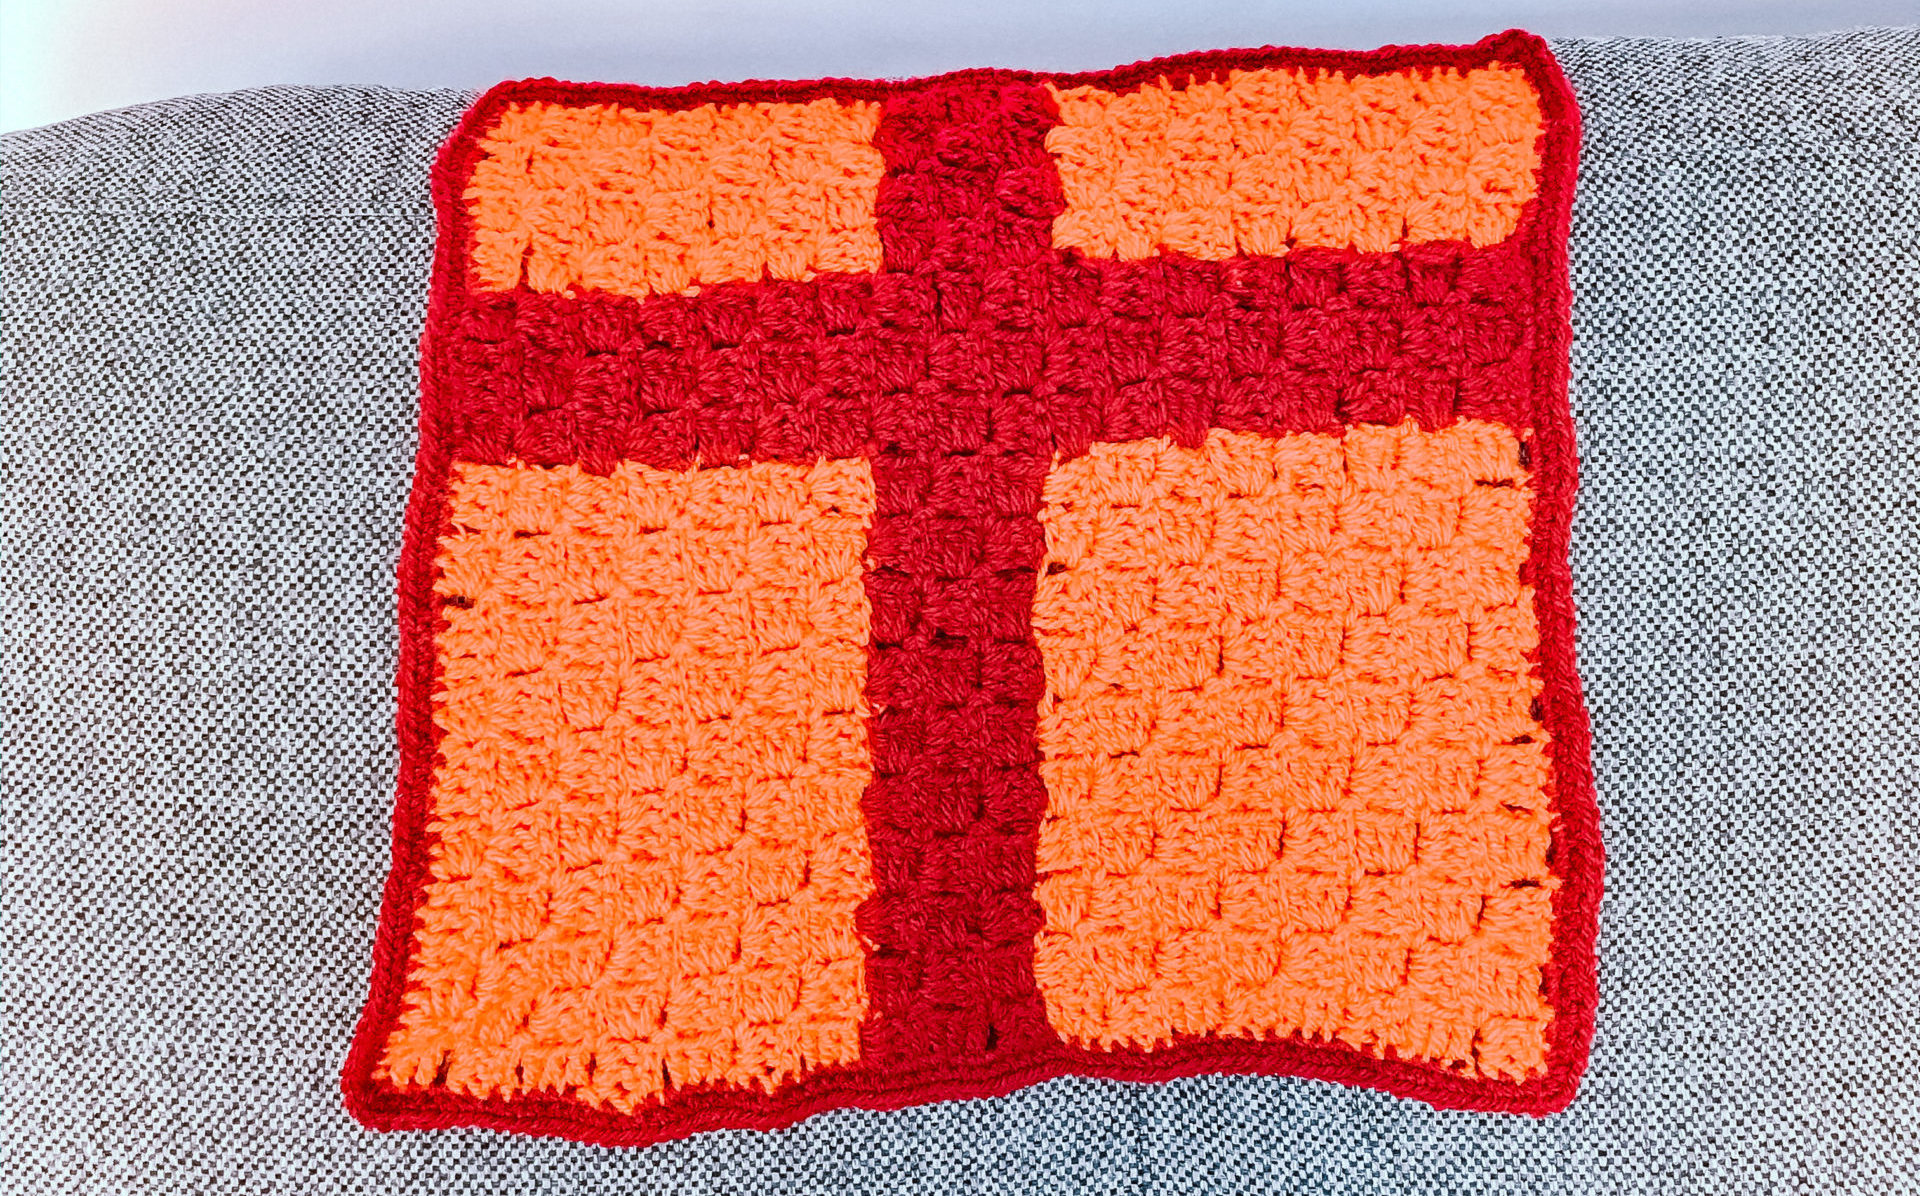
With this in mind, I thought I’ll share the pattern for this c2c crochet square with you. It’s a 12×12 inch square, which would be great as one of many 12×12 inch squares that can be sewn together to make an afghan/blanket, pillow cover or a cushion cover.
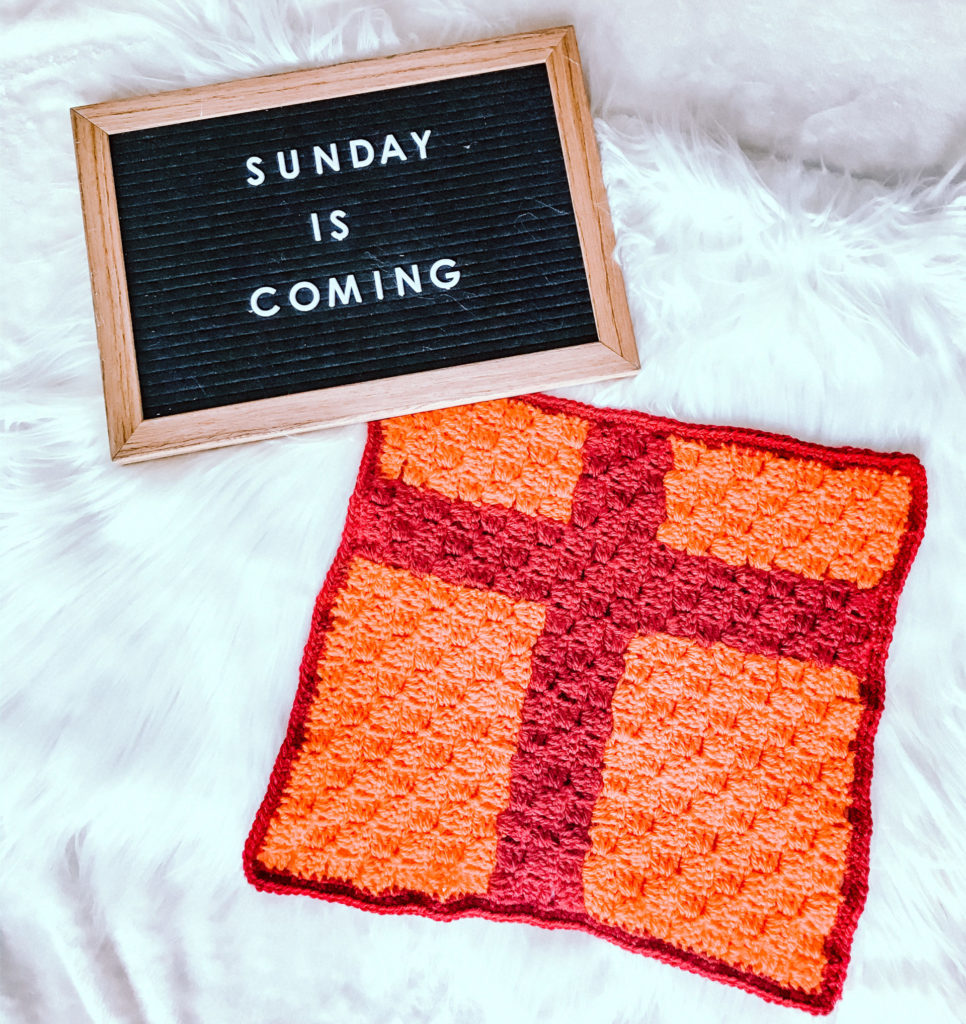
You will need to know the c2c crochet technique for you to create this pattern. If you don’t know how to c2c, check out this video, which shows you how to (including increases and decreases) and also how to change colours.
Supplies & tools:
- Aran weight yarn in 2 colours. You can choose your own colours but your contrast colour (CC) should be red. I used Paintbox Simply Aran yarn
- 5 mm/H crochet hook
- Darning needle to sew in ends
- Scissors
Abbreviations:
CC – Contrasting colour
MC – Main colour
RS – Right side
WS – Wrong side
Pattern notes:
I suggest using two separate balls of both MC and CC, when you start incorporating CC. This will help you avoid cutting yarn as you will just drop the colour you don’t need and pick up the colour you need when called for in the pattern. If you can’t use two separate balls for each, that’s absolutely fine, just cut the yarn and reattach accordingly.
I have added a border, consisting of two rounds of single crochets, around mine as I will be using it in my kitchen. Feel free to add any type of border to yours if you wish.
Finally, the sample has not been blocked but feel free to block yours, if desired.
So without further ado, let’s get to crocheting.
PATTERN
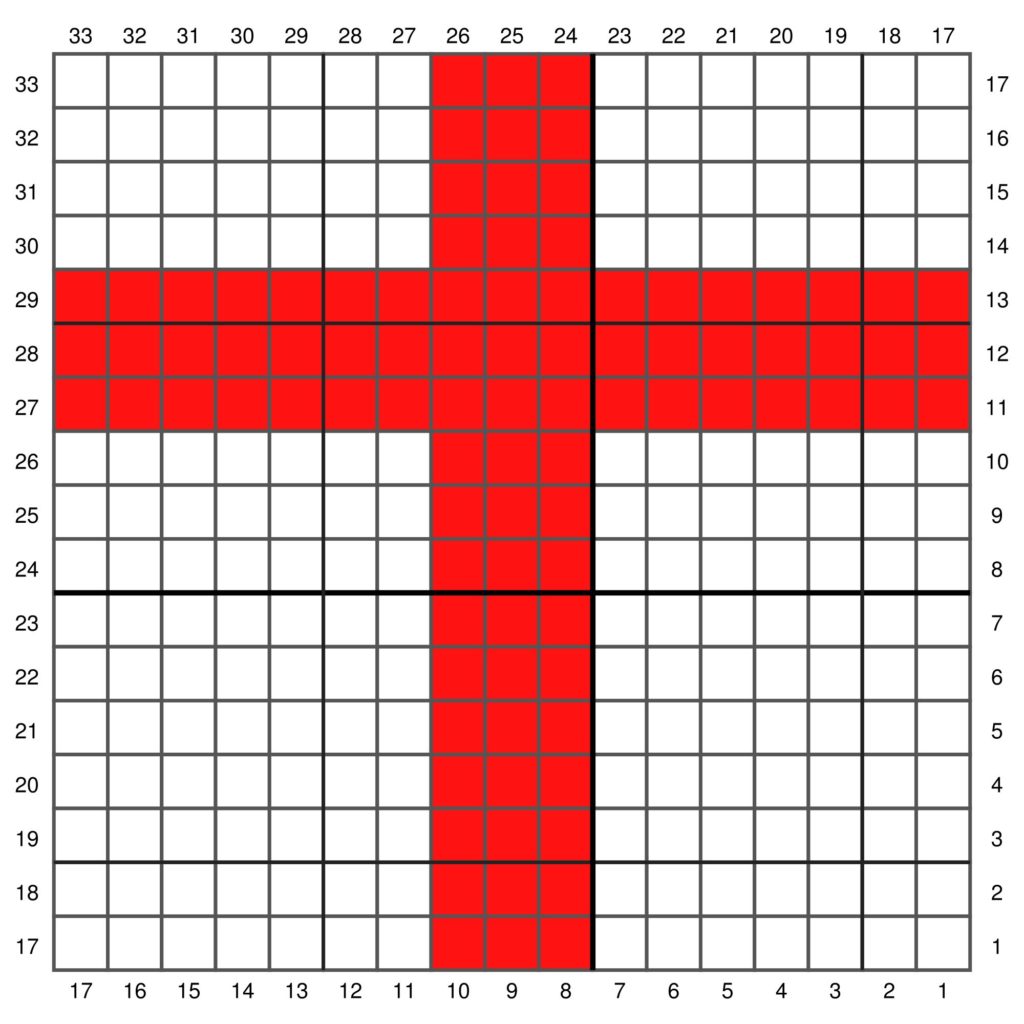
Graph (you can pin the below to your Pinterest or download a pdf version here)
Written instructions:
Starting from bottom right, work in the direction of the arrows indicated (↙ top-down; ↗ bottom-up)
START Row 1 [WS]: MC
↙ Row 2 [RS]: (MC) x 2
↗ Row 3 [WS]: (MC) x 3
↙ Row 4 [RS]: (MC) x 4
↗ Row 5 [WS]: (MC) x 5
↙ Row 6 [RS]: (MC) x 6
↗ Row 7 [WS]: (MC) x 7
↙ Row 8 [RS]: (MC) x 7, CC
↗ Row 9 [WS]: (CC) x 2, (MC) x 7
↙ Row 10 [RS]: (MC) x 7, (CC) x 3
↗ Row 11 [WS]: MC, (CC) x 3, (MC) x 6, CC
↙ Row 12 [RS]: (CC) x 2, (MC) x 5, (CC) x 3, (MC) x 2
↗ Row 13 [WS]: (MC) x 3, (CC) x 3, (MC) x 4, (CC) x 3
↙ Row 14 [RS]: MC, (CC) x 3, (MC) x 3, (CC) x 3, (MC) x 4
↗ Row 15 [WS]: (MC) x 5, (CC) x 3, (MC) x 2, (CC) x 3, (MC) x 2
↙ Row 16 [RS]: (MC) x 3, (CC) x 3, MC, (CC) x 3, (MC) x 6
↗ Row 17 [WS]: (MC) x 7, (CC) x 6, (MC) x 4
CORNER – start decrease
↙ Row 18 [RS]: (MC) x 4, (CC) x 5, (MC) x 7
↗ Row 19 [WS]: (MC) x 7, (CC) x 4, (MC) x 4
↙ Row 20 [RS]: (MC) x 4, (CC) x 3, (MC) x 7
↗ Row 21 [WS]: (MC) x 6, (CC) x 4, (MC) x 3
↙ Row 22 [RS]: (MC) x 2, (CC) x 5, (MC) x 5
↗ Row 23 [WS]: (MC) x 4, (CC) x 6, MC
↙ Row 24 [RS]: (CC) x 3, MC, (CC) x 3, (MC) x 3
↗ Row 25 [WS]: (MC) x 2, (CC) x 3, (MC) x 2, (CC) x 2
↙ Row 26 [RS]: CC, (MC) x 3, (CC) x 3, MC
↗ Row 27 [WS]: (CC) x 3, (MC) x 4
↙ Row 28 [RS]: (MC) x 4, (CC) x 2
↗ Row 29 [WS]: CC, (MC) x 4
↙ Row 30 [RS]: (MC) x 4
↗ Row 31 [WS]: (MC) x 3
↙ Row 32 [RS]: (MC) x 2
↗ Row 33 [WS]: MC
FINISH
Weave in all ends and you are done!
I would love to see your finished project, please feel free to tag me in your photos on social media:
Instagram: @handmadebykunbi
Facebook: Handmade by Kunbi

